
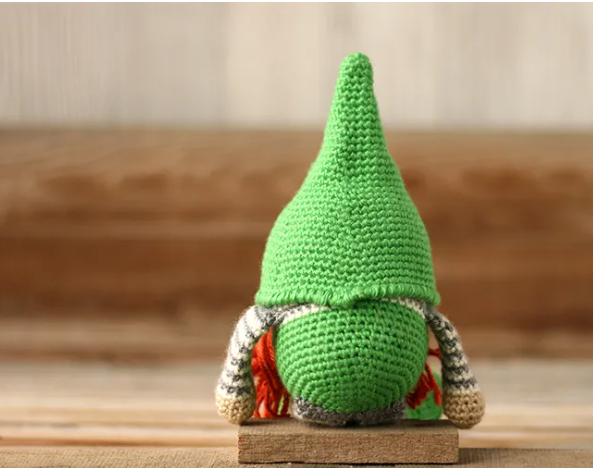
Hello friends, my other model is this dwarf pattern, it will suit every corner of your home. Let’s see how this pattern is made..
Difficulty
Intermediate
- Materials:
- Crochet Hook, Size E/4 (3.5 mm)
- Stitch Marker(s)
- Scissors
- Tapestry Needle
- Stuffing
- Chopstick, dowel, something similar to help with stuffing
- Pins
- Pet slicker brush (optional – If brushing beard)
- Yarnspirations Simply Soft (worsted 4-Medium, 100% acrylic, 315 yds/288 m, 6 oz/170 g), Color (A) Bone, used approx. 12 yds/ 11 m, Color (B) Green, used approx. 125 yds/ 114 m, Color (C) Off White, used approx. 37 yds/ 34 m, Color (D) Pumpkin, used approx. 15 yds/ 14 m
- Yarnspirations Simply Soft Heathers (worsted 4-Medium, 100% acrylic, 250 yds/228 m, 5 oz/141 g), Color (E) Grey Heather, used approx. 38 yds/ 35 m
Gauge
Using hook size E/4 (3.5 mm) the first 8 rounds of the body equal 2.75 inches in diameter.
Finished Measurements
Using hook size E/4 (3.5 mm) in the sitting position without the hat measures approximately 4.5 inches. Sitting with the hat measures approximately 8 inches (not including the legs).
Design Notes
- Pattern is written in US crochet terminology.
- A size E/4 (3.5 mm) crochet hook is recommended. That said, the ultimate desired result is to achieve a tight crochet fabric that when stuffed will not allow the stuffing to show through.
- The pattern is written in rounds. When working in rounds it is helpful to place a stitch marker at the beginning stitch of the round and move it up at the start of each additional round.
- At the end of each round the number of stitches for completion is noted in parentheses.
- Further design notes and tips will be provided throughout the pattern to help aid in construction.
Abbreviations/Stitches Used
- BLO – back loop only
- ch – Chain
- Crab st – Crab st (also called the reverse single crochet)
- FLO – front loop only
- hdc – half double crochet
- Rnd(s) – Round(s)
- sc – Single crochet
- sc2tog – Single crochet 2 stitches together (use the invisible decrease when working in the Rnd)
- sl st – Slip stitch
- st(s) – Stitch(s)
- magic circle/adjustable ring
- yo – yarn over
- [ ] – Work instructions between brackets as many times as directed
Nose
Make 1
Using Color (A) – Bone
- Rnd 1: 6sc in adjustable (magic) circle. (6sts)
- Rnd 2: 2sc in each st around. (12sts)
- Rnd 3: [Sc in the next st, 2sc in next st] 6 times. (18sts)
- Rnds 4-5: Sc in each st around. (18sts for 2Rnds)
- Rnd 6: [Sc in the next st, sc2tog] 6 times. (12sts)
- Rnd 7: [Sc in the next st, sc2tog] 4 times. (8sts)
- Sl st, fasten off.
- Firmly stuff and shape the nose. Set aside for later.
Body

Make 1
Using Color (B) – Green
- Rnd 1: 6sc in adjustable (magic) circle. (6sts)
- Rnd 2: 2sc in each st around. (12sts)
- Rnd 3: [Sc in the next st, 2sc in next st] 6 times. (18sts)
- Rnd 4: [Sc in the next 2sts, 2sc in next st] 6 times. (24sts)
- Rnd 5: [Sc in the next 3sts, 2sc in next st] 6 times. (30sts)
- Rnd 6: [Sc in the next 4sts, 2sc in next st] 6 times. (36sts)
- Rnd 7: [Sc in the next 5sts, 2sc in next st] 6 times. (42sts)
- Rnd 8: [Sc in the next 6sts, 2sc in next st] 6 times. (48sts)
- Rnds 9-15: Sc in each st around. (48sts for 7Rnds)
>Design Note: The next several rounds (Rnds 16-37) create stripes for the gnomes shirt. There is no need to cut the yarn at the end of each row. Drop and pick up colors as needed to make the color changes.
>Design Tip: To help make the stripes line up more evenly by reducing jogging with each color change, work the first stitch of each round as a sl st (counting as a stitch) instead of a sc. Note however, that while this technique decreases jogging, because the color changes are made every row, a diagonal line will be noticeable. It’s a personal preference which is more desirable. Do note that with this design the hat will cover much of the body.
Alternate the next several rounds between Color (C) – Off White and Color (E) – Grey Heather, starting with Color (C)
- Rnds 16-21: Sc in each st around. (48sts for 6Rnds)
In the next round the nose is added seamlessly to the body. Continue working the stripes as well.

Rnd 22: Sc in the next 22sts, now join the nose to the body: With the working loop still on the hook, insert hook into any st on the nose from the wrong side to the right side of the piece, then insert the hook into the next st of the body from the right side to the wrong side of the piece, yo, pull loop through the body and the nose, yo, pull through both loops, continue to join the nose and body sts together for the next 3sts, sc in the next 22sts. (48sts)

- Rnd 23: Sc in the next 22sts, now join the nose to the body: [With the working loop still on the hook, insert hook into the next st on the nose from the right side to the wrong side of the piece, then insert the hook into the next st of the body from the right side to the wrong side of the piece, yo, pull loop through the body and the nose, yo, pull through both loops] 4 times, sc in the next 22sts. (48sts)
- Rnds 24-31: Sc in each st around. (48sts for 8Rnds)
Firmly stuff and shape and continue to do so as the pattern progresses.
- Rnd 32: [Sc in the next 4sts, sc2tog] 8 times. (40sts)
- Rnd 33: [Sc in the next 3sts, sc2tog] 8 times. (32sts)
- Rnd 34: [Sc in the next 2sts, sc2tog] 8 times. (24sts)
- Rnd 35: [Sc in the next st, sc2tog] 8 times. (16sts)
- Rnd 36: [Sc in the next 2sts, sc2tog] 4 times. (12sts)
- Rnd 37: [Sc in the next st, sc2tog] 4 times. (8sts)
- Sl st, fasten off leaving a long tail for closing the hole.
- Close the hole using a tapestry needle.
>Design Tip: When closing the hole use only the front loops and move around the circle from stitch to stitch until the hole closes nicely.
Hat

Make 1
Using Color (B) – Green
- Rnd 1: 6sc in adjustable (magic) circle. (6sts)
- Rnd 2: [Sc in the next st, 2sc in next st] 3 times. (9sts)
- Rnd 3: Sc in the next 4sts, 2sc in next st, sc in the next 4sts. (10sts)
- Rnd 4: Sc in the next 9sts, 2sc in next st. (11sts)
- Rnd 5: Sc in the next 5 sts, 2sc in next st, sc in the next 5sts. (12sts)
- Rnd 6: Sc in each st around. (12sts)
Weave in the starting tail. It may be necessary to put the tail on a tapestry needle and pull it to the right side of the work to weave it in.
- Rnd 7: [Sc in the next 3sts, 2sc in next st] 3 times. (15sts)
- Rnd 8: Sc in the next 7 sts, 2sc in next st, sc in the next 7sts. (16sts)
- Rnd 9: Sc in the next 15sts, 2sc in next st. (17sts)
- Rnd 10: Sc in the next 8sts, 2sc in next st, sc in the next 8sts. (18sts)
- Rnd 11: [Sc in the next 5sts, 2sc in next st] 3 times. (21sts)
- Rnd 12: Sc in the next 10 sts, 2sc in next st, sc in the next 10sts. (22sts)
- Rnd 13: Sc in the next 21sts, 2sc in next st. (23sts)
- Rnd 14: Sc in the next 11sts, 2sc in next st, sc in the next 11sts. (24sts)
- Rnd 15: [Sc in the next 3sts, 2sc in next st] 6 times. (30sts)
- Rnd 16: [Sc in the next 9sts, 2sc in next st] 3 times. (33sts)
- Rnd 17: Sc in the next 16sts, 2sc in next st, sc in the next 16sts. (34sts)
- Rnd 18: Sc in the next 33sts, 2sc in next st. (35sts)
- Rnd 19: Sc in the next 17sts, 2sc in next st, sc in the next 17sts. (36sts)
- Rnd 20: [Sc in the next 5 sts, 2sc in next st] 6 times. (42sts)
- Rnd 21: [Sc in the next 13sts, 2sc in next st] 3 times. (45sts)
- Rnd 22: Sc in the next 22sts, 2sc in next st, sc in the next 22sts. (46sts)
- Rnd 23: Sc in the next 45sts, 2sc in next st. (47sts)
- Rnd 24: Sc in the next 23sts, 2sc in next st, sc in the next 23sts. (48sts)
- Rnd 25: [Sc in the next 7sts, 2sc in next st] 6 times. (54sts)
- Rnd 26: [Sc in the next 8sts, 2sc in next st] 6 times. (60sts)
- Rnd 27: [Sc in the next 9sts, 2sc in next st] 6 times. (66sts)
- Rnds 28-33: Sc in each st around. (66sts for 6Rnds)
- Rnd 34: Crab stitch (reverse sc) in each st around. (66sts)
- Fasten off leaving a tail to join the beginning and the end of the crab stitch. Weave in the end.
Shoes
Make 2
Using Color (B) – Green
- Ch 10
- Rnd 1: Working in the back bar of the chain: Sc in the 2nd ch from the hook, sc in the next 7sts, 3sc in the last st (corner rounded), working down the other side of the ch: sc in the next 7sts, 2sc in the last st. (20sts)
- Rnd 2: 2sc in the next st, sc in the next 7sts, 2sc in the next st, sc in the next st, 2sc in the next st, sc in the next 7sts, 2sc in the next st, sc in the next st. (24sts)
- Rnd 3: Sc in the next st, 2sc in the next st, sc in the next 6sts, hdc in the next 2sts, 2hdc in the next st, hdc in the next 2sts, 2hdc in the next st, hdc in the next 2sts, sc in the next 6sts, 2sc in the next st, sc in the next st. (28sts)
- Rnd 4: Sc in the next st, 2sc in the next st, sc in the next 6sts, 2hdc in the next st, hdc in the next 2sts, 2hdc in the next st, hdc in the next 4sts, 2hdc in the next st, hdc in the next 2sts, 2hdc in the next st, sc in the next 6sts, 2sc in the next st, sc in the next st. (34sts)
- Rnd 5: In BLO: Sc in each st around. (34sts)
- Rnd 6: Sc in each st around. (34sts)
- Rnd 7: Sc in the next 9sts, [sc2tog] 8 times, sc in the next 9sts. (26sts)
- Rnd 8: Sc in the next 9sts, [sc2tog] 4 times, sc in the next 9sts. (22sts)
- Rnd 9: Sc in the next 7sts, hdc in the next 2sts, [sc2tog] 2 times, hdc in the next 2sts, sc in the next 7sts. (20sts)
- Rnd 10: Sc in the next 7sts, [sc2tog] 3 times, sc in the next 7sts. (17sts)
- Stuff and shape the shoe and continue to do so until completed but leave the back loops of Rnd 12 exposed for future use.
- Rnd 11: Sc in the next 2sts, sc2tog, [sc in the next st, sc2tog] 4 times, sc in the next st. (12sts)
- Rnd 12: In FLO: sc in each st around. (12sts)
- Sl st, fasten off and weave in the end.
Leg
Make 2
The legs are worked in stripes. Like the body, the first stitch of each row can be made a sl st if desired to help with jogging. There is no need to cut the yarn at the end of each row. Drop and pick up colors as needed to make the color changes. Leave the legs unstuffed.
Using Color (C) – Off White
- Rnd 1: Working in the back loops of Rnd 12 of the shoe, fasten on to the st at the center back of the shoe with a standing sc and sc in each st around. (12sts)
Switch to Color (E) – Grey Heather
- Rnd 2: Sc in each st around. (12sts)
- Add more stuffing to reach the top of the shoe but do not stuff the leg.
Alternate the remaining rounds between Color (C) Off White and Color (E) – Grey Heather, starting with Color (C)
- Rnds 3-20: Sc in each st around. (12sts for 18 Rnds)
- Cut the Color (C) – Off White yarn and push the tail into the leg.
- Press the tube flat so the top edges line up, ch1, and sc the two edges together across the top. (6sts)
- Fasten off leaving a long tail for attaching the leg to the body.
Hand and Arm
Make 2
Using Color (A) – Bone
- Rnd 1: 6sc in adjustable (magic) circle. (6sts)
- Rnd 2: 2sc in each st around. (12sts)
- Rnd 3: [Sc in the next 3sts, 2sc in next st] 3 times. (15sts)
- Rnd 4: [Sc in the next 3sts, sc2tog] 3 times. (12sts)
- Rnd 5: Sc in each st around. (12sts)
Firmly stuff and shape the hand. Leave the remaining part of the arm unstuffed.
The rest of the arm is worked in stripes. Like the body, the first stitch of each row can be made a sl st if desired to help with jogging. There is no need to cut the yarn at the end of each row. Drop and pick up colors as needed to make the color changes.
Alternate the remaining rounds between Color (C) Off White and Color (E) – Grey Heather, starting with Color (C)
- Rnds 6-17: Sc in each st around. (12sts for 12 Rnds)
- Cut the Color (C) – Off White yarn and push the tail into the arm.
- Press the tube flat so the top edges line up, ch1, and sc the two edges together across the top. (6sts)
- Fasten off leaving a long tail for attaching the arm to the body.
Beard

Using Color (D) Pumpkin
- Cut 60, 6 inch lengths of yarn (more if a fuller beard is desired, longer if a longer beard is desired).

- Holding two strands together, loop yarn lengths around the stitches onto the body. Placement: All loops are placed around a Color (E) – Grey Heather Stripe. On Rnd 21, place 4 loops directly under the nose and three loops to each side of these loops for a total of 10 loops. On Rnd 23, place 4 loops on each side of the nose for a total of 8 loops. The first loops are placed flush with the nose on either side and then move outward. On Rnd 25, place 4 loops above the nose and 4 loops to each side of these loops for a total of 12 loops. (30 total loops)
- Trim if desired. Unravel or brush yarn strands if desired.
Assembly

- Pin the legs side by side about two rows in front of the magic circle on the base of the body. Using the tail on the leg attach the leg to the body along the top edge of the leg and then along each side of the leg for a couple rows so the top bit of the leg remains flush against the bottom of the body.
- Pin the arms to the body; placed at the vertical midline of the body and sewn diagonally over Rnd 16-20 with the joining seam on the underside of the arm. Stitch along the top.
- Invisibly tack the hat onto the body in several places to make sure that it doesn’t fall off.


